


DIY multi flash sync
This is my flash sync box (basically just four safe syncs in parallel) that I built last Saturday. I can connect up to four external flashes to it (the four black RCA-connectors on the back) and then connect the box to my camera (the red RCA-connector on the front). I can also connect other triggers to the box instead of a camera (a sound trigger for example).
First I designed a pcb for the box and then printed it on a transparency sheet to use it as a mask when exposing an uv sensitive pcb plate. After that I developed and etched the board and soldered all the parts to it. I used an empty 2.5" USB HDD case as a case for the board because I had it lying around without any other use. I cut about 2cm off from it to make it a bit smaller. The device gets its juice from the 3V lithium battery inside it or from an external power supply (the power switch toggles between those two).
Dimensions: width 75mm, height 13mm, depth 105mm (124mm with connectors).
Front of the box: A test button to see if the device works (every connected flash should fire when this is pressed), sync connector (camera or other trigger), power switch (left: internal 3V lithium, right: external power), external power connector (3-6 VDC).
Back of the box: Connectors for four different flashes, can be a new flash with low trigger voltage or an older flash with high trigger voltage (maximum is 600V as the thyristors I used are rated at that).
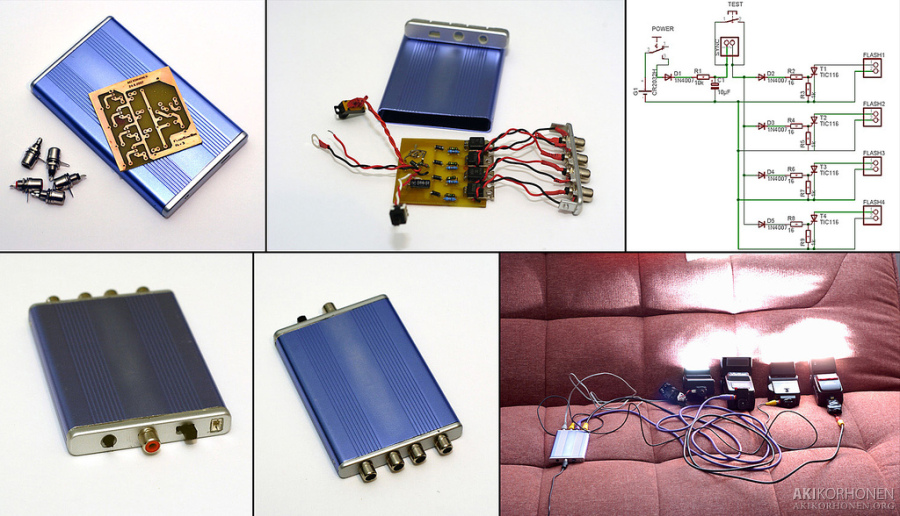
multisyncbox.jpg
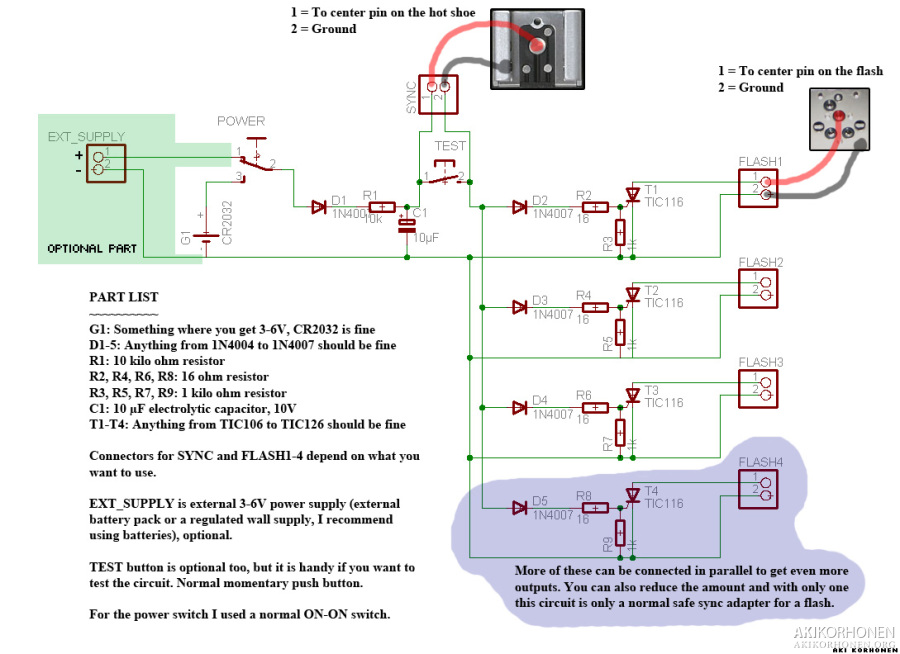
multisyncbox_schematic.jpg