


Cleaning of a Micro-Nikkor 55mm/2.8 AIS
I bought a Micro-Nikkor 55mm f/2.8 in good condition about a year ago for a good price. Everything else was good but soon I noticed a lag with the aperture blades and noticed that they were quite oily. I did some searching and found out that it is a common problem with the f/2.8 version. The lens looked a bit compicated on the inside and didn"t want to disassemble it back then and asked for prices how much would a cleaning cost and it was too much (I could have bought atleast another one with that price) so the lens left as is.
Few days ago I just happened to search how could I disassemble the lens and found out these to pages and it seemed that the lens wasn"t so compicated as I first thought. These gave some good pointers on what screws had to be removed so I wouldn"t take off unnecessary screws. As the second page didn"t have photos of the aperture mechanicm I thought I'll take photos of every step.
» Disassembling 55mm/2.8 (Japanese)
» Micro-Nikkor 55mm f/2.8 Aperture Blade Cleaning (no photos)
I noticed that the cross screw driver in Dealextreme's "Cross and Trigram Screw Drivers 2-piece Kit for NDS NDSL and Wii" -set I recently purchased was perfect for every screw on the lens.
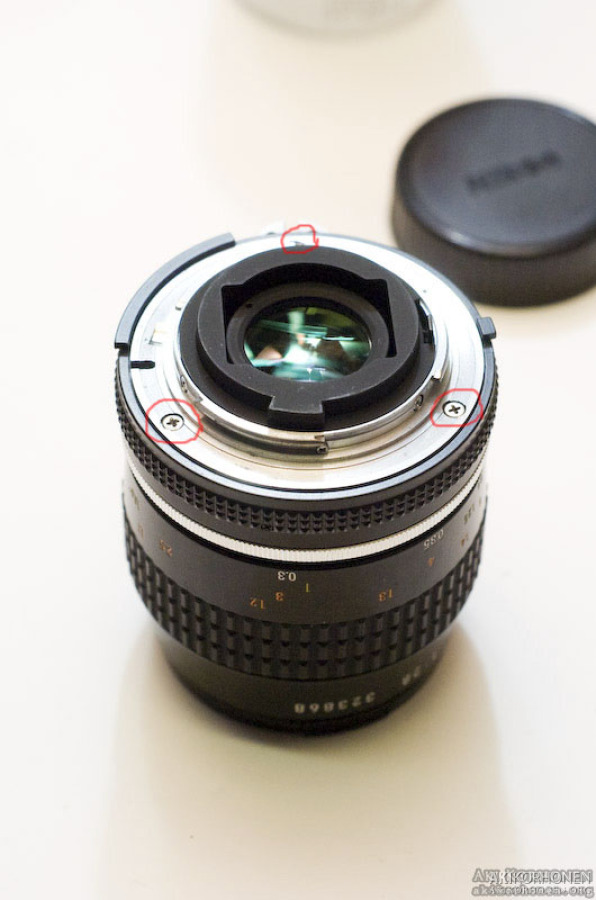
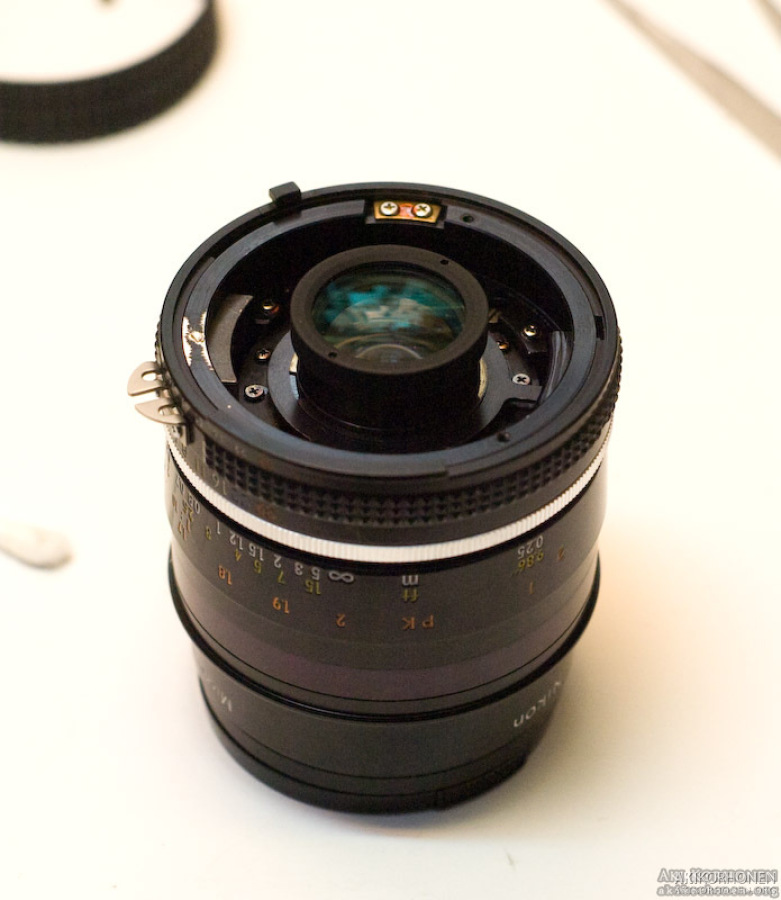
First the three screws on the bayonet mount are removed and it lifts off:
m_ak06211.jpg

m_ak06218.jpg
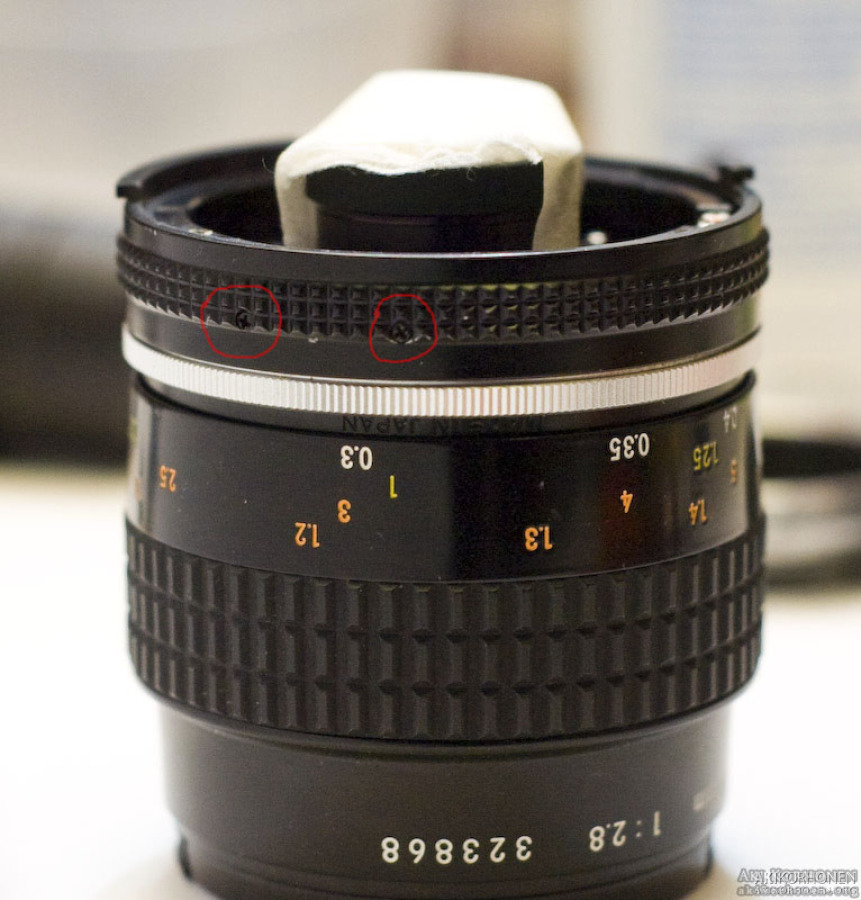
After that the two very small screws on the aperture ring are removed and the ring is taken off (the tape thing on the rear lens is what I added for protection):
m_ak06220.jpg
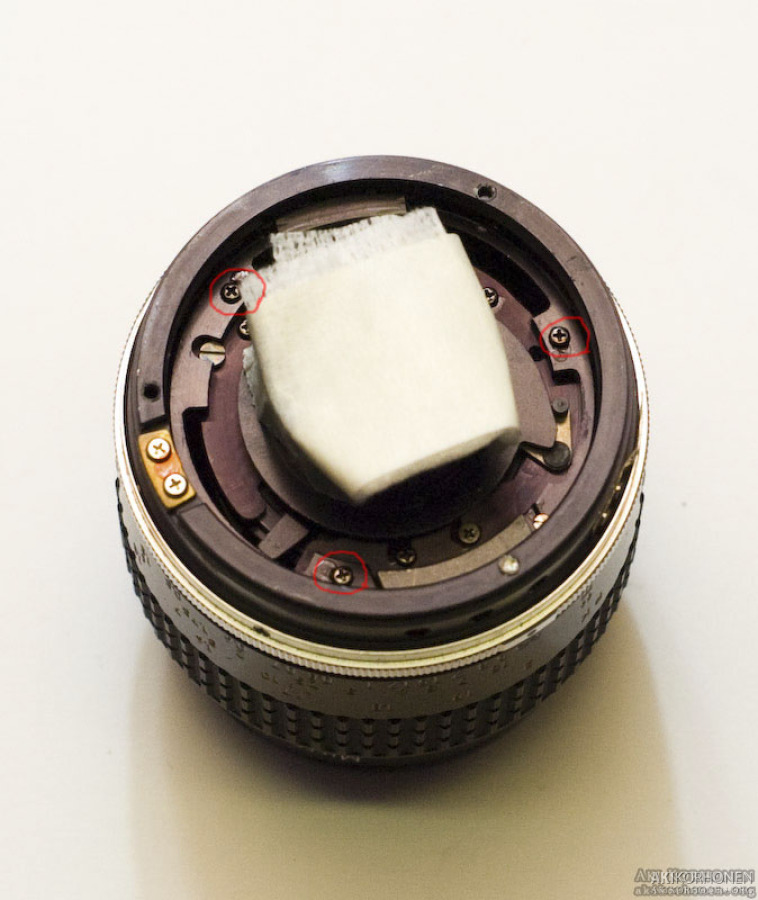
After removing the ring, next up are the three screws holding the inner mechanism in place. Carefully lift the outer shell off the inner part after removing the screws.
m_ak06222.jpg
m_ak06223.jpg
To remove the rear lens + aperture assembly from the rest, remove the three round screws (already removed in the photo) and carefully lift the assembly up.
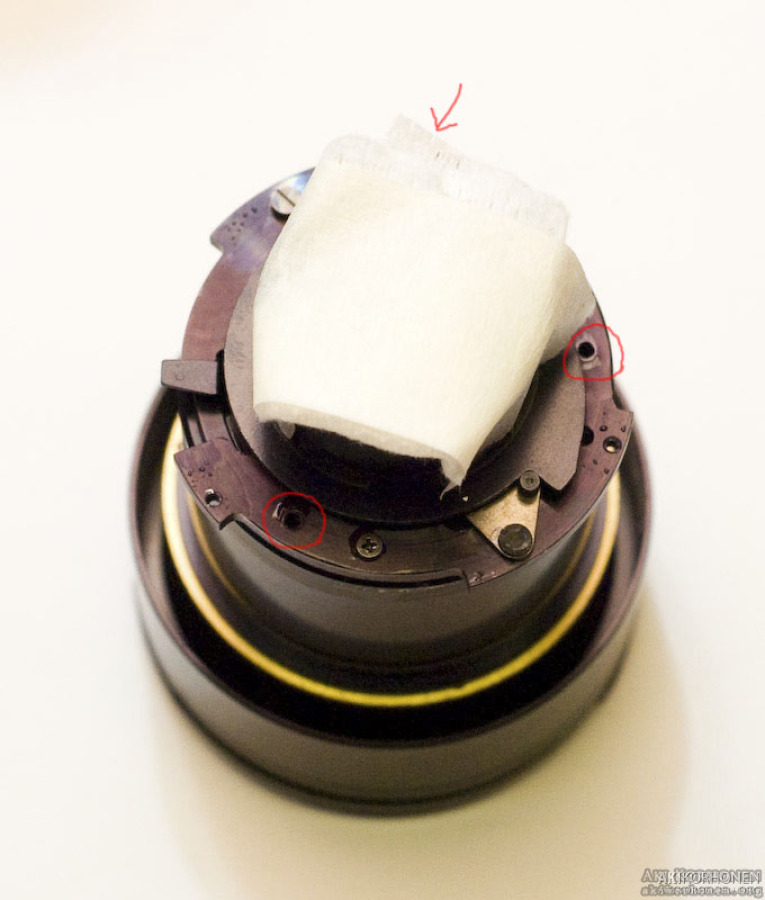
m_ak06224.jpg
m_ak06225.jpg
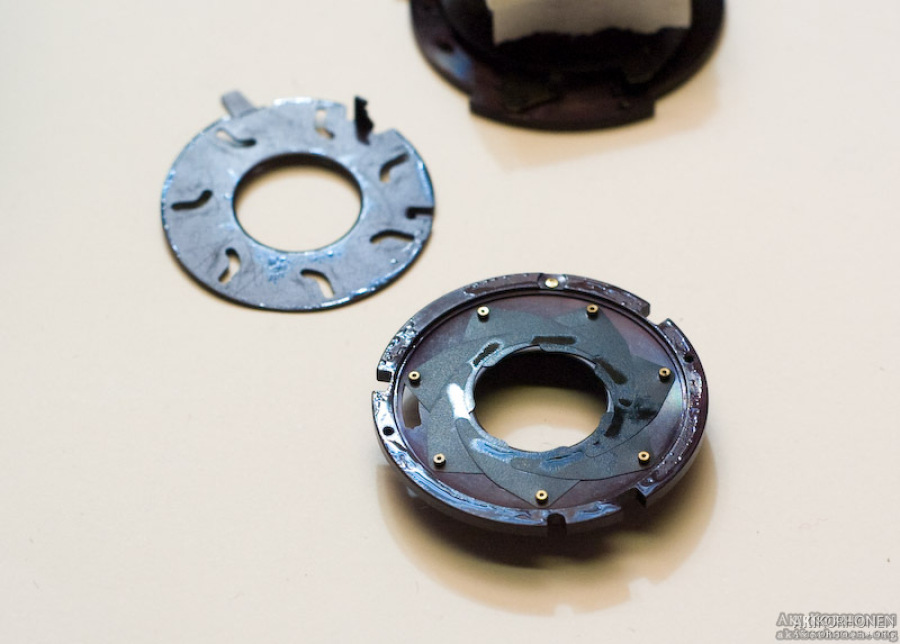
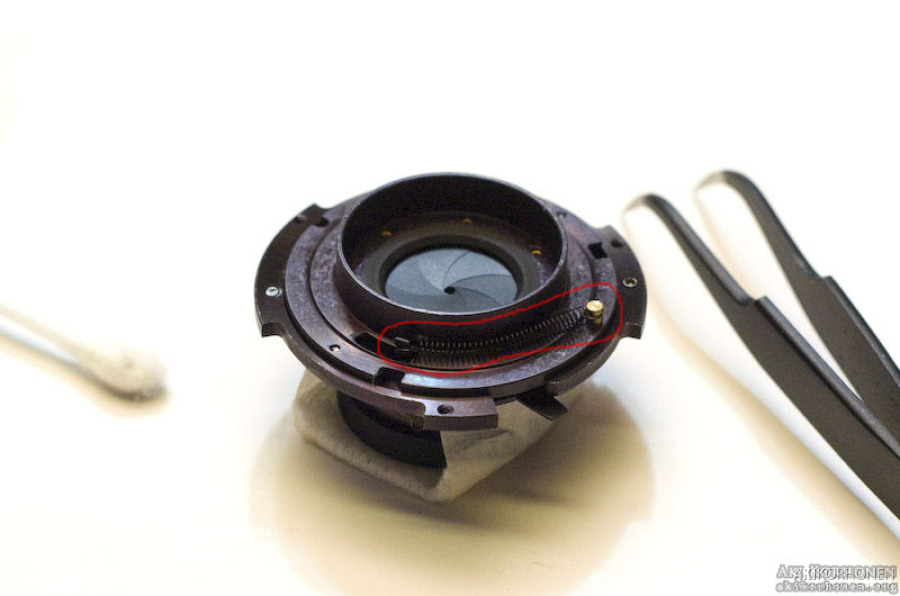
In the next photo you can see how oily the aperture mechanism was in my lens. Carefully remove the spring from the place that is marked (already removed in the photo). Then remove the two flat cross screws from the opposite side and carefully lift off the lens part and put it aside (and clean off the oil residues with isoprophyl alcohol and q-tips).
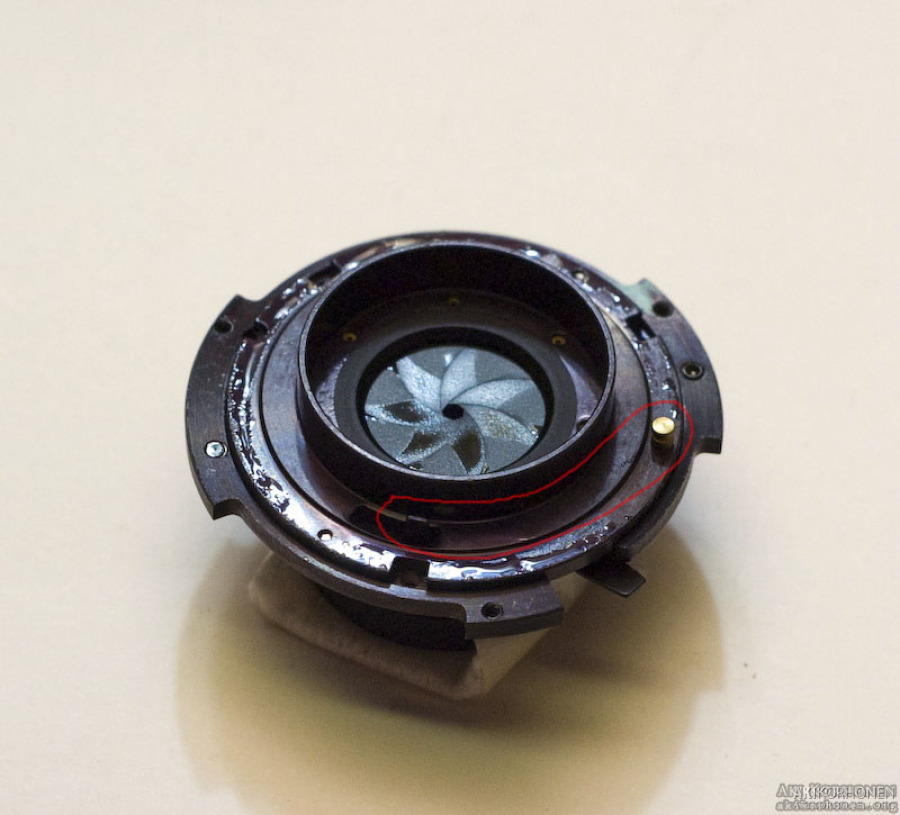
m_ak06227.jpg
m_ak06228.jpg
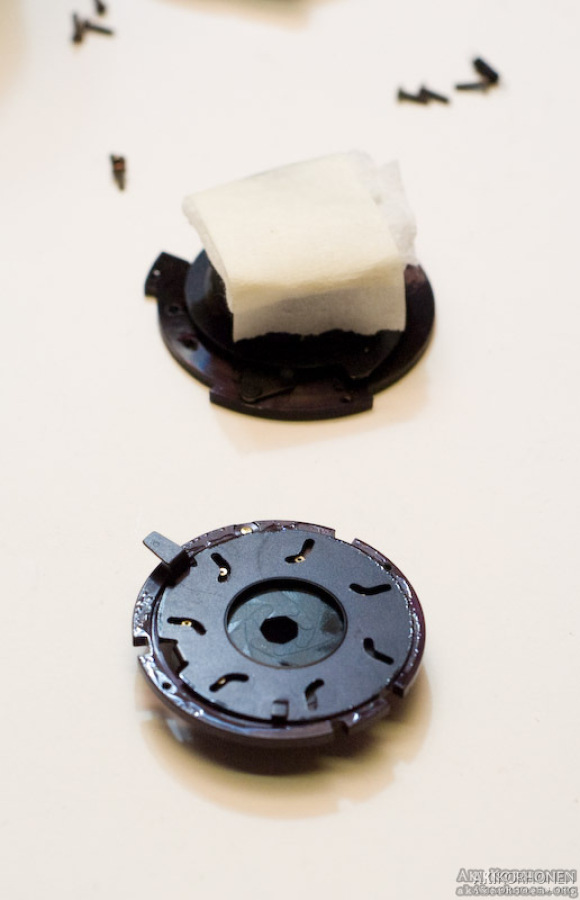
Lift off the blade controller and clean it with isoprophyl alcohol.
m_ak06231.jpg
I then removed all the aperture blades and poured some isoprophyl alcohol on a cup and left the blades there for some time. I then took them out, dried them and then carefully took the last residues off with a q-tip. Remember to be very careful with the blades as they are very thin! Use tweezers to handle them.

m_ak06233.jpg
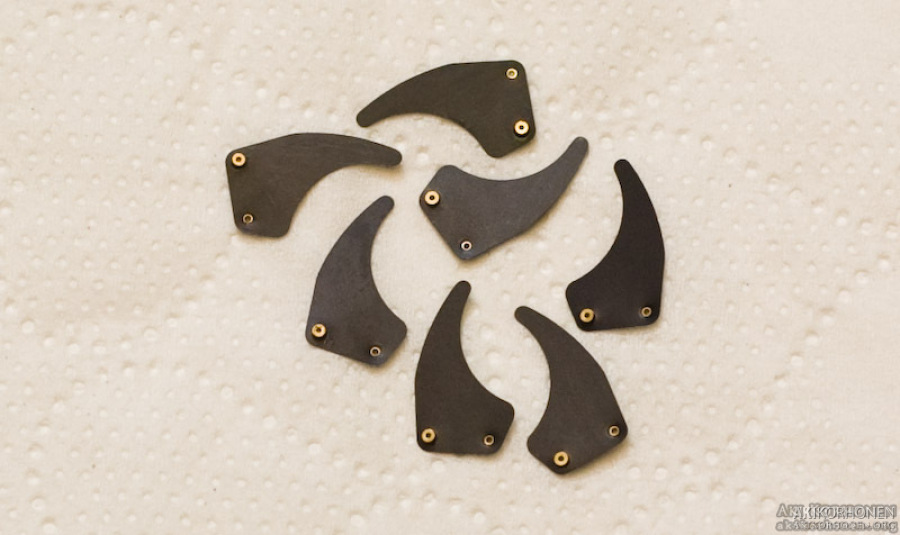
m_ak06237.jpg
While the blades were swimming in the alcohol I cleaned the base thoroughly.
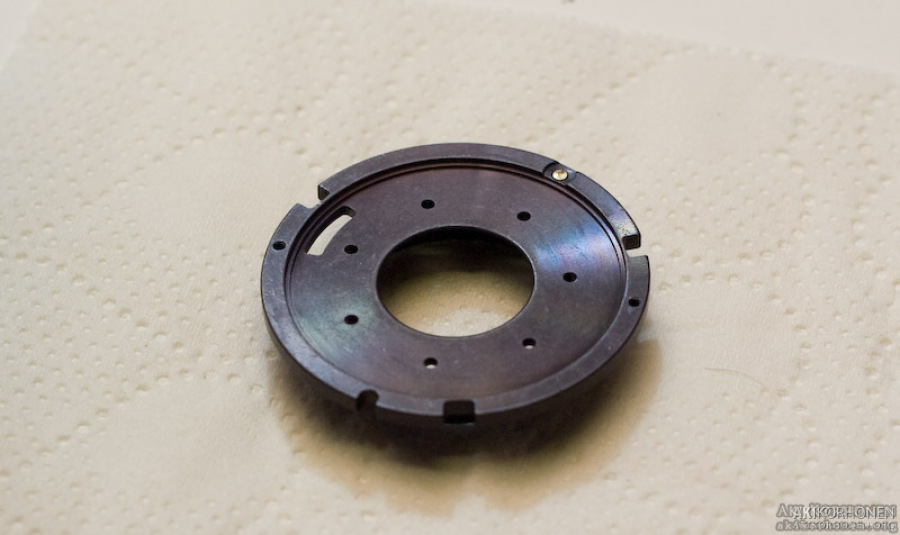
m_ak06234.jpg
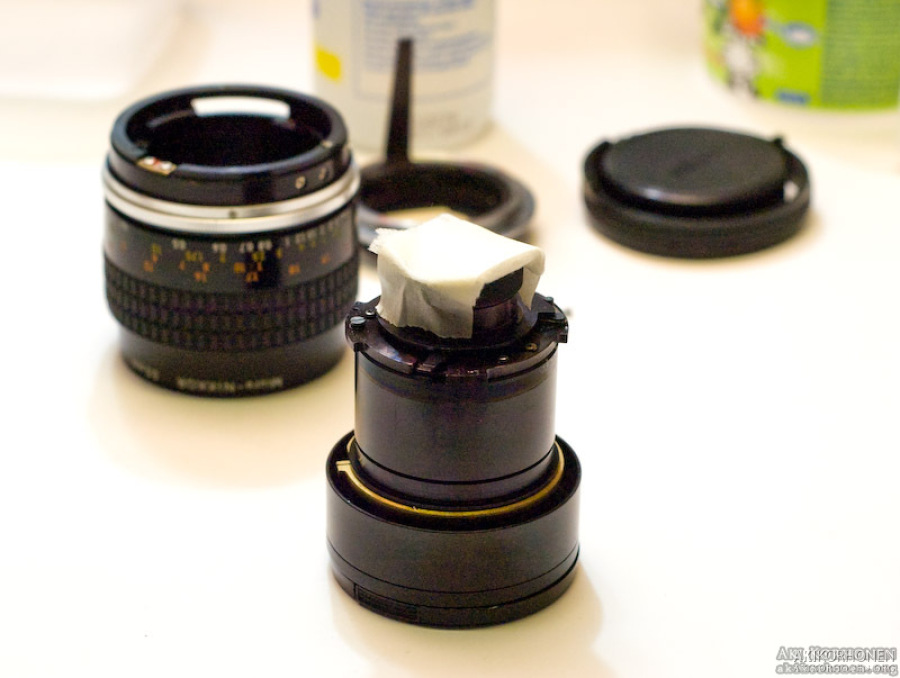
I decided to clean the outer focusing mechanism from the old grease and put some better stuff instead. The parts are separated by taking away the three screws on the side of the other part (removed in the photo) to remove the stopper part. I then immersed the other half in the cleaning alcohol and cleaned the other part separately. After cleaning the parts I put some non-dripping teflon grease on the touching parts and assembled it back to one piece.

m_ak06241.jpg

m_ak06242.jpg
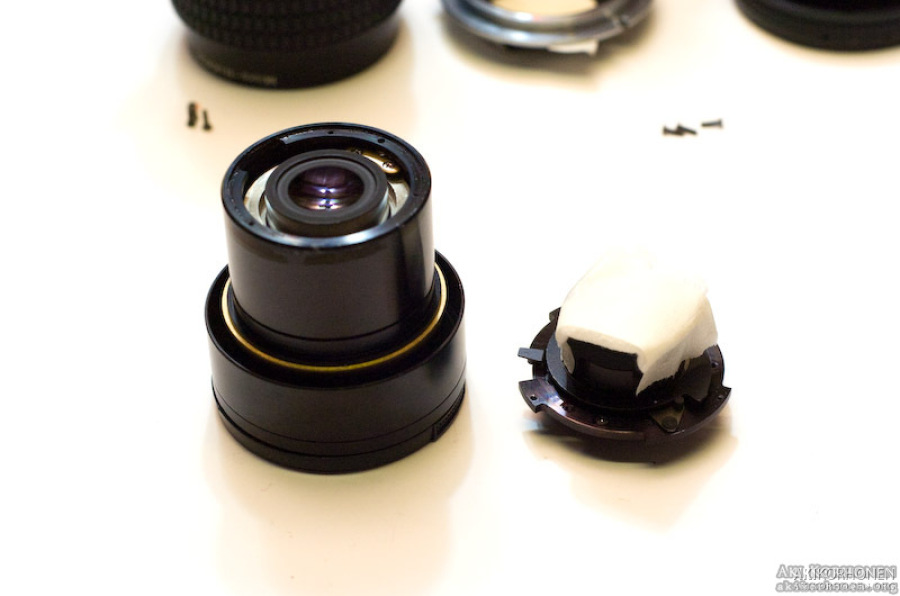
All the bits and pieces at this moment:
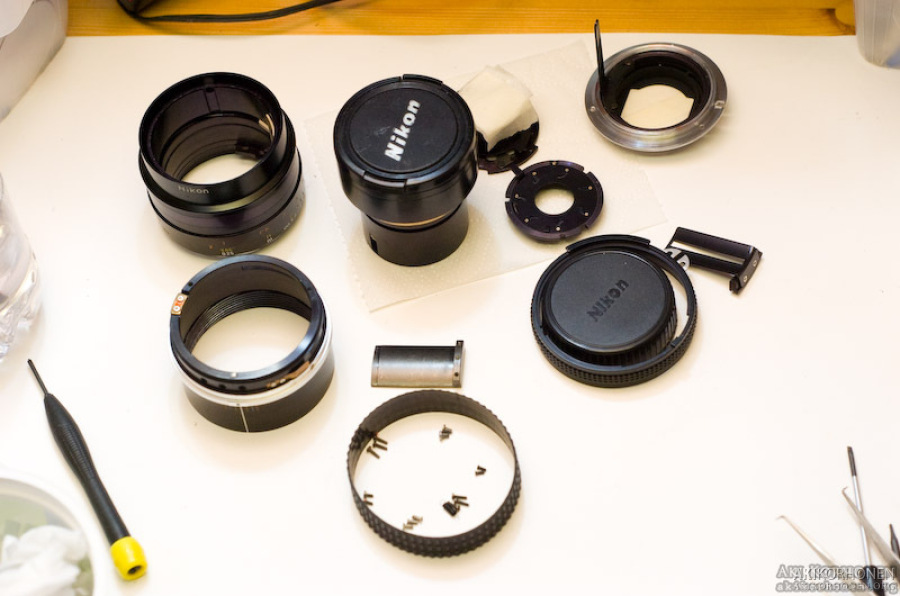
m_ak06246.jpg
After all necessary parts are cleaned it's time to start putting all the pieces together again in reverse order. First the aperture mechanism (now looking very nice and clean).
Quote from the page I linked in the beginning as it was so well described:
"15. Replace the aperture blades inside the lower enclosure. The blades lie so that their tips hook clockwise. The clockwise blade must lie beneath the counter-clockwise blade, so that the CCW blade doesn"t hit against the CW blade's hinge pin when you try to open up the aperture. I made that mistake the first time. Make sure that you tuck the final (seventh) blade back underneath the first one."

m_ak06251.jpg
Put the rear lens back above the aperture mechanism, screw back the the flat cross screws, flip it over and reattach the spring to its own place.
m_ak06252.jpg
Carefully insert the rear assembly back on the its place and screw back the three round cross screws.

m_ak06254.jpg
Slide the lens part inside the outer shell, put back the aperture lever on the inside and screw the three screws back. Then put back the aperture ring and reattach the two small screws. Finally put back the bayonet mount and the last screws.
m_ak06257.jpg
Done! After cleaning it now works like a charm and the aperture blades seem very responsive compared to what it was before.

m_ak06259.jpg