


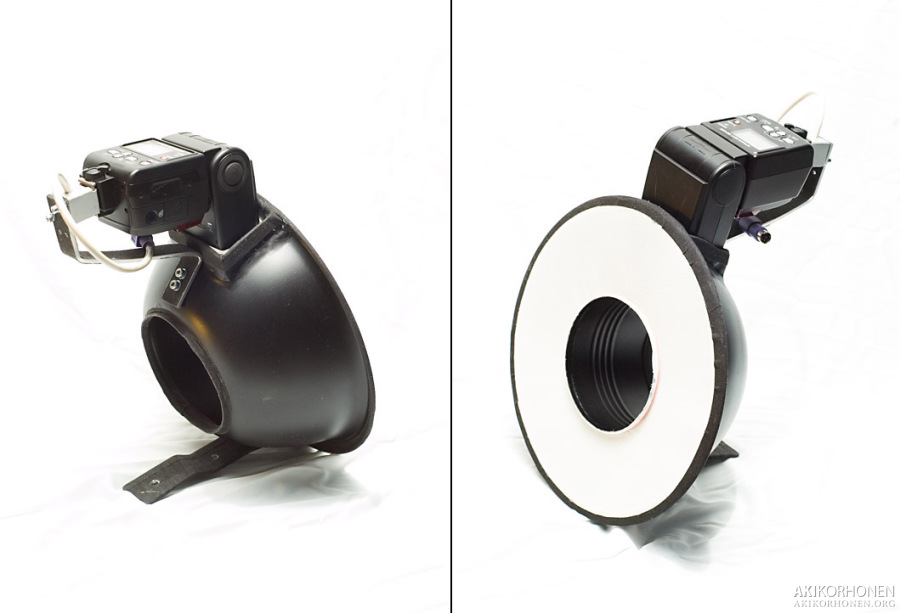
Ringflash
(Photo, starting from top left) Description
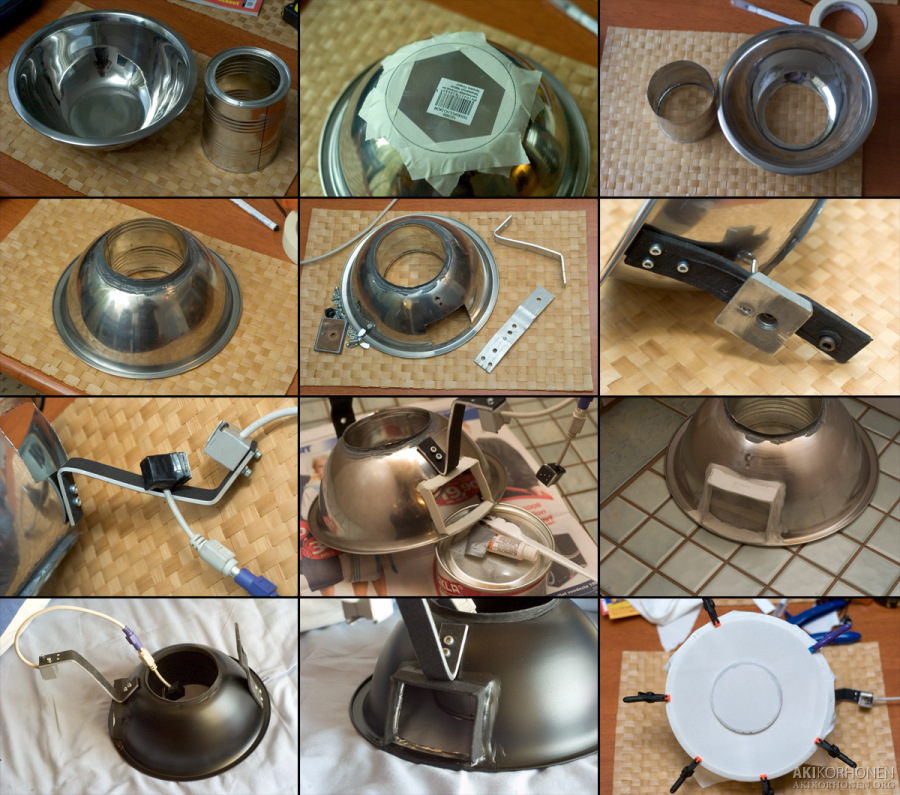
(1) I started with a 24 cm diameter steel bown and a normal food can.
(2) Added some tape on the bowl and drew the cutting lines with the can as a guide.
(3) Bottom from the bowl and can removed. I also shortened the cat a little bit. I first drilled a hole on the bottom of the bowl and then cut the metal with metal cutters.
(4) The two parts connected with strong epoxy that was meant for metals.
(5) Hole for the flash made and few connecting holes drilled. Also the needed aluminum parts are cut and bent in shape.
(6) The bottom part covered with black hockey tape. In the photo it has a Manfrotto quick attachment plate on it. Also has a hole for attaching it to the tripod mount of the camera.
(7) The top part where the flash is attached. Made some holes for the DIY TTL flash cord.
(8) I added some plastic parts for the flash hole to make it look nicer and to prevent light from escaping too much. Next I added some putty to finish it (wasn"t necessary but I got too carried away again with the building).
(9) Putty and the bowl fully sanded and waiting for some gray primer and matte black finish.
(10) Painted and finished. Added some black hockey tape on the can's edge to prevent it from scratching the camera.
(11) Close up of the flash hole. A little bit of aluminum foil tape on the inside and black hockey tape on the edge.
(12) White thin fabric streched and being glued on the edges to get some diffusion to the light. There is a rubber band holding the fabric to the can.
Cost: bowl 3€, can 0€, aluminum 1€ + some extra costs from paints etc. but I'm not going to count them to the total. Cheap anyway.
ringflash_workflow.jpg
ringflash_finished.jpg

ringflash_finished_withcamera.jpg